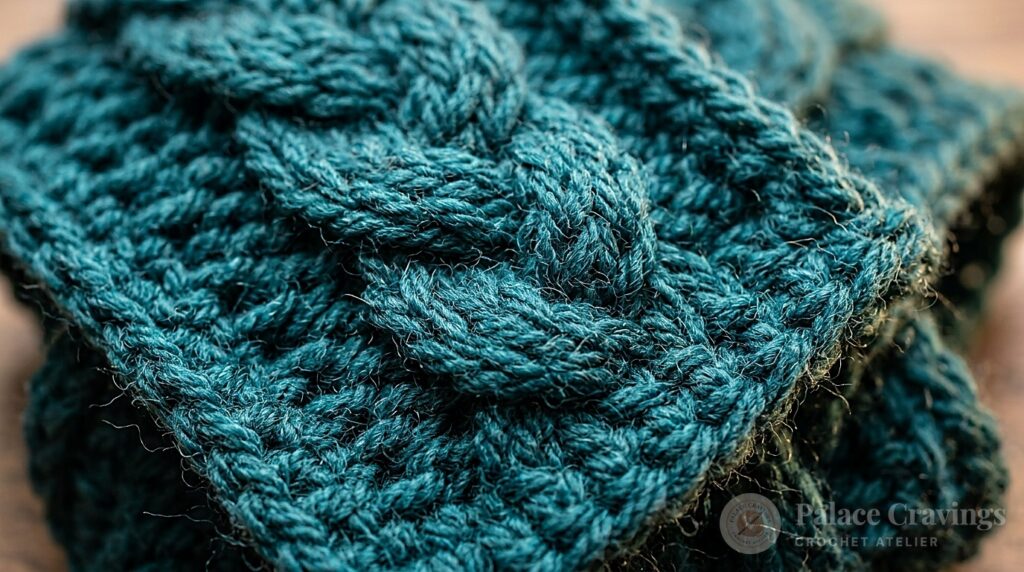
When brisk winter winds roll in, nothing feels quite as luxurious as slipping your hands into cozy wool mitts. But between answering text messages, sipping hot coffee, and rummaging through your handbag, traditional closed mittens can feel frustratingly clumsy. These Cozy Cable Crochet Fingerless Mittens deliver the best of both worlds: heirloom-quality braided Aran cable twists that keep your wrists and palms toasty warm, paired with open fingertips for modern convenience!
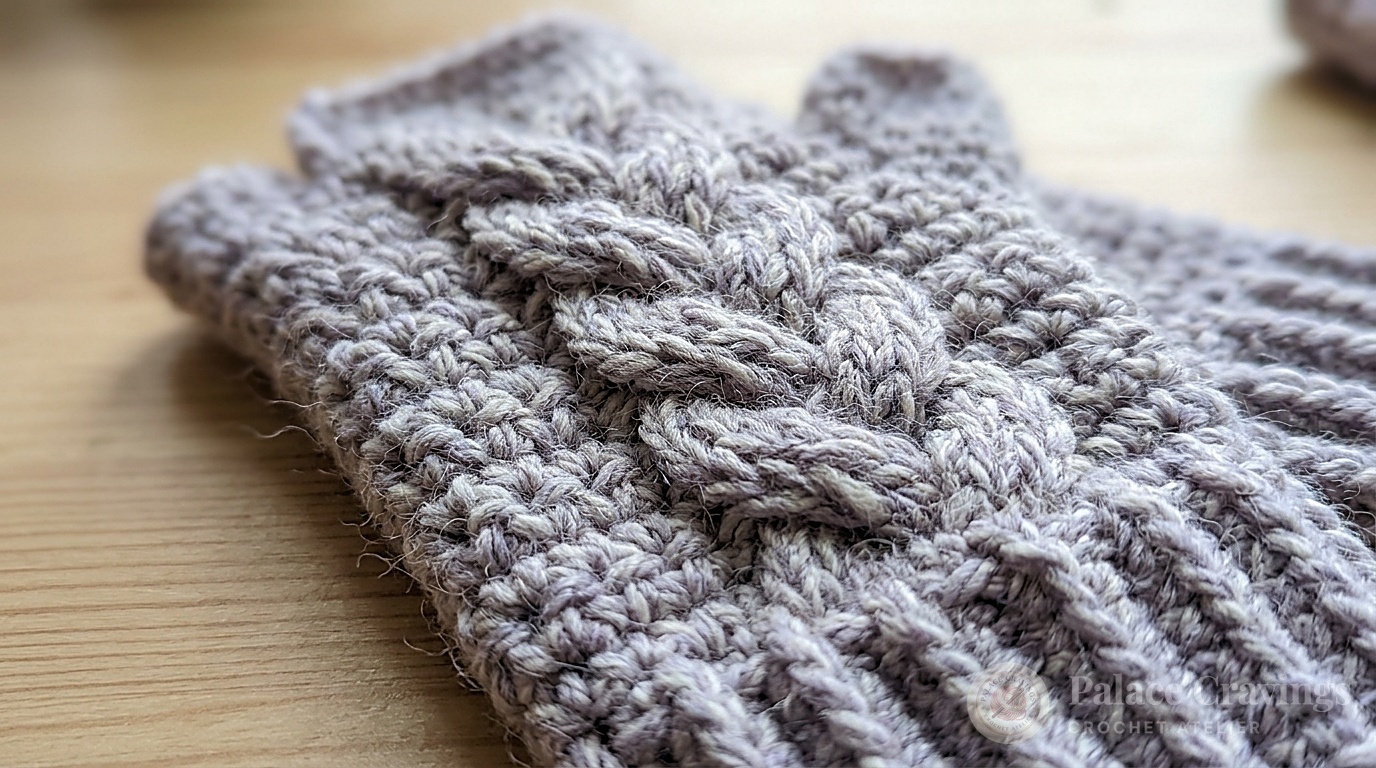
The construction begins at the wrist with a snug, stretchy post-stitch ribbed cuff worked in alternating front and back post half-double crochet. Once the cuff reaches two inches, you transition into the main hand section, where front post double crochet stitches cross over skipped posts every four rounds to create dramatic, raised rope cables that look remarkably like traditional Celtic knitwear. An integrated thumb gusset expands naturally along the palm side, leaving a smooth opening that won’t pinch or bunch around your thumb.
Why You’ll Love Crocheting These Cable Mittens
- Authentic Knit-Look Cable Texture: Front post crochet creates deep, sculptural cables that stand proud against the background fabric, proving you don’t need knitting needles for high-end Celtic style.
- Practical Smartphone-Friendly Design: Open fingers allow you to type on touchscreens, drive, knit, or sip hot drinks without ever removing your gloves.
- Elastic, Non-Sagging Cuff: The post-stitch ribbing grips your wrist snugly, tucking effortlessly under winter coat sleeves without drafting or sliding down.
- Fast Weekend Project: Worked in DK weight yarn with a 4.5mm hook, an entire pair can be finished in just two relaxing evenings, making them a sensational holiday gift.
Key Materials & Smart Swaps

- DK Weight Yarn (#3 Light / DK): Patons® Classic Wool DK Superwash™ (1.75 oz/50 g; 125 yds/114 m):
- Color: Wisteria (12309) – 2 balls (approx. 250 yds total for the pair).
Smart Swaps: Lion Brand Heartland, Knit Picks Swish DK, or Paintbox Simply DK provide lovely stitch definition and softness for wool-sensitive skin.
- Crochet Hook: Size U.S. 7 (4.5 mm) or size needed to obtain gauge. An ergonomic silicone handle prevents fatigue when working dense front post stitches.
- Locking Stitch Markers: Essential for marking the cable panel edges and tracking thumb gusset increase points.
- Yarn Tapestry Needle: For weaving in ends neatly inside the ribbed cuffs and thumb border.
- Soft Measuring Tape: To check palm circumference and cuff height as you work.
Tested Studio Essentials for Garment & Cable Crochet
★ 4.9 (48k+ reviews)
Clover Amour 4.5mm (Size 7) Ergonomic Hook
The optimal hook for cable crossovers. The smooth aluminum throat slides behind post stitches without snagging or splitting delicate wool plies.
★ 4.9 (24k+ reviews)
Clover Locking Quick-Lock Stitch Markers
Mark cable repeat rows and thumb gusset increases easily. Secure clasp ensures they won’t pop open while working tight post stitches.
★ 4.8 (12k+ reviews)
Fiskars 4-Inch Classic Precision Stork Scissors
Snip yarn ends cleanly when changing skeins or weaving in thumb openings with surgically sharp precision blades.
Disclosure: As an Amazon Associate, Palace Cravings earns from qualifying purchases at no additional cost to you.
Step-by-Step Crochet Instructions

Gauge Check: 17 half-double crochet stitches and 15 rows = 4 inches [10 cm] using a 4.5mm hook. Taking time to check gauge ensures the mittens fit snugly without squeezing.
Special Stitches:
• Hdcfp (Front Post Half Double Crochet): Yo, insert hook from right to left around post of next st at front of work. Yo, pull up a loop (3 loops on hook). Yo, draw through all 3 loops.
• Hdcbp (Back Post Half Double Crochet): Yo, insert hook from right to left around post of next st at back of work. Yo, pull up a loop. Yo, draw through all 3 loops.
• Dcfp (Front Post Double Crochet): Yo, insert hook from right to left around post of next st at front. Yo, pull up loop. [Yo, draw through 2 loops] twice.
• 4-Stitch Cable Cross: Skip next 2 dcfp. 1 dcfp around each of next 2 dcfp. Working in front of the 2 stitches just made, work 1 dcfp around each of the 2 skipped dcfp.
1. Elastic Ribbed Wrist Cuff (Make 2):
Ch 36 loosely. Join with sl st to first ch, ensuring chain is not twisted.
1st Round: Ch 2 (does not count as st throughout). 1 hdc in each ch around. Join with sl st to first hdc. (36 hdc).
2nd Round: Ch 2. 1 hdcfp around first hdc. *1 hdcbp around next hdc, 1 hdcfp around next hdc; repeat from * to last st. 1 hdcbp around last hdc. Join with sl st to first hdcfp.
3rd Round: Ch 2. 1 hdcfp around first hdcfp. *1 hdcbp around next hdcbp, 1 hdcfp around next hdcfp; repeat from * to last st. 1 hdcbp around last hdcbp. Join with sl st to first hdcfp.
Repeat 3rd round until cuff measures 2 inches [5 cm] from beginning edge.
2. Right Hand Cable Body:
Set-Up Round: Ch 2. 1 hdc in each st around. Join with sl st to first hdc. Place marker on last st.
1st Cable Round: Ch 2. 1 hdc in each of first 5 hdc. 1 dcfp around next hdc. 1 hdc in next hdc. 1 dcfp around each of next 4 hdc. 1 hdc in next hdc. 1 dcfp around next hdc. 1 hdc in each of remaining 23 hdc. Join with sl st to first hdc.
2nd Cable Round (Cable Twist): Ch 2. 1 hdc in each of first 5 hdc. 1 dcfp around next dcfp. 1 hdc in next hdc. Work 4-Stitch Cable Cross over next 4 dcfp. 1 hdc in next hdc. 1 dcfp around next dcfp. 1 hdc in each of next 23 hdc. Join.
3rd & 4th Rounds (Straight Rounds): Ch 2. 1 hdc in each of first 5 hdc. 1 dcfp around next dcfp. 1 hdc in next hdc. 1 dcfp around each of next 4 dcfp. 1 hdc in next hdc. 1 dcfp around next dcfp. 1 hdc in each of next 23 hdc. Join.
3. Thumb Gusset Shaping:
Work cable pattern as established across back of hand while executing thumb increases on palm side:
5th Round: Work cable panel as established over first 13 sts. 1 hdc in each of next 4 hdc. 2 hdc in next hdc (first increase). 1 hdc in each of next 2 hdc. 2 hdc in next hdc. 1 hdc in each of next 17 hdc. Join. (38 sts).
6th Round (Cable Twist): Work Cable Cross over cable panel. Work even in hdc around palm. Join.
7th Round: Work cable panel. 1 hdc in each of next 4 hdc. 2 hdc in next hdc. 1 hdc in each of next 6 hdc. 2 hdc in next hdc. 1 hdc in each of next 17 hdc. Join. (40 sts).
8th Round: Work Cable Cross over cable panel. Work even around. Join.
9th Round (Thumb Separation): Work cable panel. 1 hdc in each of next 5 hdc. Skip next 8 hdc for thumb opening. 1 hdc in each of remaining 18 hdc. Join with sl st to first hdc. (32 sts remaining for hand body).
4. Upper Hand & Fingerless Ribbed Trim:
10th to 14th Rounds: Continue cable panel across back of hand and hdc around palm (working Cable Cross on 10th and 14th rounds).
15th & 16th Rounds (Top Ribbing): Ch 2. *1 hdcfp around next st, 1 hdcbp around next st; repeat from * around. Join with sl st. Fasten off and weave in end.
5. Thumb Opening Border:
Join yarn with sl st at thumb base. Ch 2.
Work 10 hdc evenly around the 8 skipped stitches and thumb corner spaces. Join with sl st to first hdc.
Next 2 Rounds: Ch 2. *1 hdcfp around next st, 1 hdcbp around next st; repeat from * around. Join. Fasten off and weave in tails.
Left Hand Mitten:
Work cuff identical to Right Mitten. To position the cable panel symmetrically across the left hand, place the 13-stitch cable panel starting on the 18th stitch of the round so cables sit centered on the back of the hand. Follow thumb gusset increases correspondingly.
3 Crafter Secrets for Flawless Crochet Cables
1. Maintain Long Loop Height on Post Stitches:
When reaching down to work front post double crochet stitches, pull your working yarn loop up to the full height of your working round. Keeping the post loose prevents the cable from cinching the hand fabric too tightly.
2. Use Superwash Wool for Memory & Elasticity:
Pure acrylic yarns can stretch out and lose their grip around the wrist. Superwash wool (like Patons Classic Wool DK) retains its natural spring, ensuring your cuffs snap back snugly after every wear.
3. Wet Block with Hand Forms or Towel Rolls:
Gently soaking your finished mitts and drying them over rolled hand towels sets the 4-stitch cable twists into crisp, clean relief while smoothing out any slight tension irregularities.
How to Style Your Cable Mittens

- Outdoor Winter Walks: Keeps palms and pulse points warm while leaving fingertips free to handle leashes, car keys, or phones.
- Drafty Office Warmth: Perfect for working at a computer or typing in air-conditioned offices during chilly winter months.
- Coordinated Gift Ensemble: Pair with a matching cable crochet beanie or ribbed cowl in the same wisteria lilac hue for an unforgettable handmade winter gift set.
Washing & Garment Care Instructions
- Machine Wash Gentle: Because Patons Classic Wool DK is superwash treated, you can machine wash on a delicate cold cycle inside a mesh garment bag.
- Drying: Lay flat on a clean dry towel to air dry. Reshape cables with your fingers while damp. Never tumble dry on high heat.
- Storage: Store flat in a breathable cotton drawer sachet with cedar balls to protect natural wool fibers from moths.
Frequently Asked Questions
Can I make these full mittens instead of fingerless?
Yes! To make full mittens, simply continue working in rounds without transitioning to ribbing, decreasing 4 stitches evenly every other round until 12 stitches remain, then cinch closed with a tapestry needle.
Are front post stitches difficult for beginners?
Not at all! Front post stitches simply insert the hook around the vertical post of the stitch below rather than under the top loops. Once you complete the first cable repeat, the rhythm becomes second nature.
How do I adjust the sizing for larger or smaller hands?
To adjust palm circumference, add or subtract stitches in multiples of 2 from the plain half-double crochet palm section, keeping the 13-stitch cable panel unchanged.
Save This Free Cable Mitten Pattern to Pinterest
Ready to crochet your next favorite winter accessory? Pin this pattern to your Crochet Wearables or Winter Crochet Patterns board on Pinterest so you have it ready whenever you need it!