Suspending a potted houseplant in a handcrafted cord holder brings living greenery to eye level while freeing up window sills and table surfaces. While knot-intensive macramé requires complex rope cutting formulas, this crochet hanging planter uses thick 4mm unbleached cotton cord and open chain-space arches to build a 4-arm suspension system and expanding diamond basket that cradles common flower pots with balanced, symmetrical tension.
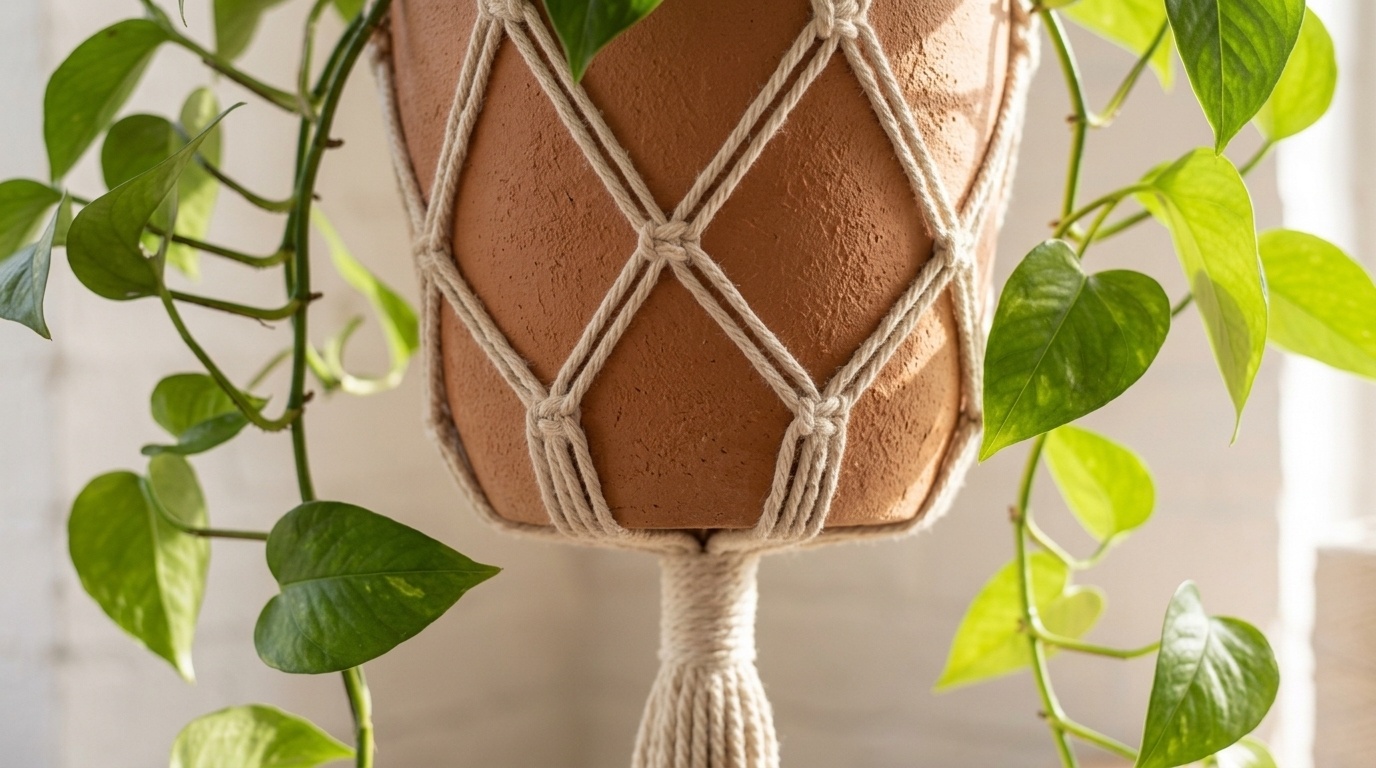
How This 4-Arm Plant Hanger Is Built
Before picking up your hook, understand the structural path of this project. The hanger is worked in four connected phases from the top hanging point downward to the tassel fringe:

[ TOP BIRCH WOOD RING (6.5 cm) ]
|
[ 24 Single Crochets Enclosing Ring ]
|
+————-+————+————-+
| | | |
[Arm A1] [Arm A2] [Arm A3] [Arm A4] (4 Equal Suspension Straps)
(Stitch 1) (Stitch 7) (Stitch 13) (Stitch 19)
| | | |
+————-+————+————-+
|
[ Upper Basket Junctions (Round 1) ]
4 Spanning Ch-8 Arches
|
[ Mid Basket Diamond Stagger (Round 2) ]
4 Centered Ch-7 Arches
|
[ Lower Basket Taper (Round 3) ]
4 Contracted Ch-5 Arches
|
[ BASE DRAWSTRING CINCH ]
(Threaded through 4 Base Arches)
|
[ 15 CM COMBED TASSEL FRINGE ]
Reference Cord, Ring & Hook Specifications
Because suspended plant holders rely on physical balance and cord strength rather than stitch density alone, choosing the correct fiber construction prevents premature stretching and cord slippage.

- Cord Construction: 4mm single-twist unbleached natural cotton. Single-twist cord provides minimal mechanical stretch compared to loose multi-ply knitting yarn, while allowing the cut base ends to comb out into a smooth, even tassel fringe.
- Top Suspension Ring: 6.5 cm outer diameter smooth raw birch hardwood ring (inner diameter approximately 4.5 cm). The hardwood core does not deform under hanging tension and provides a solid foundation for the enclosing single crochet ring cover.
- Hook Size: 6.0 mm (US J-10). Working 4mm cord with a 6.0 mm hook ensures clean loop clearance without forcing stiff yarn splits while keeping individual chain stitches firm and uniform.
- Locking Stitch Markers: Exactly 4 contrasting plastic markers to divide the 24 ring-enclosing stitches into four equal 6-stitch quadrants before starting suspension arms.
- Reference Pot Tested: Standard commercial 12 cm (4.75 in) terracotta clay pot with 13 cm top outer diameter, 38 cm upper circumference, and 10 cm base height.
How to Measure Your Pot Before Crocheting
Commercial plant pots vary widely in taper, wall thickness, and depth. Before starting, measure three primary dimensions on your target pot:
- Dimension A (Hanging Clearance Height): Measure from the intended ceiling hook down to your desired pot rim level. This determines your suspension arm chain length.
- Dimension B (Upper Pot Circumference): Wrap a flexible tailor tape measure around the pot exterior approximately 2 to 3 cm below the top rim. This represents the widest point the upper basket arches must span.
- Dimension C (Vertical Basket Height): Measure from 2 cm below the top rim straight down the side wall to the bottom edge of the pot base. This determines how many diamond rounds are needed.
Divide Dimension B by 4 to obtain the target quadrant span. For example, a 38 cm pot circumference has a quadrant span of 9.5 cm. Measure your chain gauge with a test swatch of 10 chains in your chosen cord. Adjust your foundation chain count so that the un-stretched ch-8 arch lies comfortably across one pot quadrant without excessive sag or over-tightening.
Step 1: Cover the Ring & Mark Four Equal Anchor Points
Working single crochets around the wooden ring encloses the core in durable cotton padding, protects the cord against friction from metal ceiling S-hooks, and creates exact stitch anchors for the four suspension arms.

- Leaving a 15 cm tail, make a slip knot on your 6.0 mm hook. Hold the 6.5 cm birch ring in your non-dominant hand.
- Insert the hook through the center opening of the ring from front to back. Yarn over 4mm cord and draw a loop through the ring to the front (2 loops on hook). Yarn over and draw through both loops to complete the first single crochet over the ring core.
- Repeat around the ring until you have completed exactly 24 single crochets encircling the wood. Slide the stitches snugly as you work to conceal the wood evenly.
- Join with a slip stitch into the first single crochet of the round. Cut working yarn leaving a 15 cm tail, and fasten off securely.
- Quadrant Marking: Place Marker 1 in the join stitch (Stitch 1). Count forward 6 stitches and place Marker 2 in Stitch 7. Count forward 6 stitches and place Marker 3 in Stitch 13. Count forward 6 stitches and place Marker 4 in Stitch 19. Verify that exactly 5 unworked stitches remain between each marked anchor.
Step 2: Crochet Four Equal Suspension Arms
Each arm is worked independently from its designated quadrant anchor stitch downward to the basket rim.

- Arm A1: Join 4mm cotton cord with a standing slip stitch in marked Stitch 1. Chain 45 stitches (or your custom chain count for Dimension A) using firm, uniform tension. Fasten off leaving a 20 cm working tail.
- Arms A2, A3, A4: Repeat the exact same procedure in marked Stitches 7, 13, and 19. Work the exact same chain count on every arm.
- Verification Before Basket Joining: Lay the ring flat on your workbench with all four chains smoothed straight and parallel. Align the ends against a measuring tape. If any arm differs by more than one chain due to tension variations, adjust the chain count by adding or removing a chain so all four suspension points match exactly before proceeding.
Step 3: Build the Expanding Diamond Basket
The basket bridges the four vertical suspension arms into an interconnected diamond mesh net that expands outward to grip the pot taper and contracts inward underneath the pot base.

- Round 1 (Arm Joining & Upper Basket Arches): With working yarn joined at the bottom of Arm A1, chain 8. Work 1 single crochet into the bottom chain of Arm A2. Chain 8, work 1 single crochet into Arm A3. Chain 8, work 1 single crochet into Arm A4. Chain 8, join with a slip stitch into the first single crochet at Arm A1. (Result: 4 connecting ch-8 arches spanning the four arms in a closed circular basket).
- Round 2 (Mid-Basket Diamond Stagger): Slip stitch into the first 4 chains of the first ch-8 loop to reach the arch apex. Chain 1 (does not count as stitch), 1 single crochet around the ch-8 space. *Chain 7, 1 single crochet around the next ch-8 space; repeat from * twice more. Chain 7, join with a slip stitch to the first single crochet. (Result: 4 staggered diamond arches positioned midway down the pot wall).
- Round 3 (Lower Basket Taper Arches): Slip stitch into the first 3 chains of the first ch-7 loop. Chain 1, 1 single crochet in the chain space. *Chain 5, 1 single crochet in the next ch-7 space; repeat from * twice more. Chain 5, join with a slip stitch to the first single crochet. Fasten off and weave in starting tails securely. (Result: 4 smaller ch-5 arches contracting inward around the pot base curve).
Step 4: Empty-Pot Test Fit, Base Cinch & Combed Fringe
Cinching the bottom arches securely under the pot base forms the load platform that holds the flower pot in place.

- Stage A — Empty-Pot Test Fit: Place your empty reference pot inside the crochet basket. Pull the four suspension arms upward with gentle tension. Verify that the Round 1 arches sit evenly 2 to 3 cm below the top pot rim and that the Round 3 arches cup the lower bottom edge without slipping upward.
- Thread the Base Cinch Cord: Cut a 60 cm length of 4mm cotton cord. Using a blunt tapestry needle, weave the cord through the center of all four Round 3 ch-5 arches in a continuous circle.
- Tighten Base & Secure Gathering Knot: Pull both ends of the cinch cord firmly until the four base arches draw together tightly under the center bottom of the pot. Tie a double square knot to lock the base diameter.
- Stage B — Add Tassel Fringe Ends: Cut 8 pieces of 4mm cord, each 35 cm long. Fold them in half and loop them through the cinched base arches alongside the cinch tails (total of 18 cord ends).
- Gathering Wrap Knot: Cut a 50 cm binding cord. Form a downward U-loop against the tassel bundle. Wrap the long tail tightly around the bundle 6 to 8 times from top downward. Pass the wrapping end through the bottom loop, then pull the top tail firmly until the loop is drawn midway under the wraps. Trim excess binding tails flush.
- Comb & Trim: Using a fine-tooth pet comb or wire brush, gently unravel and brush out the 4mm single-twist cotton cord ends into a dense, fluffy fringe. Trim straight across with sharp shears to an even length of 15 cm.
Hanging Safety, Hardware & Care Recommendations
Unlike flat table accessories, suspended home decor requires attentive hardware selection and regular inspection to ensure lasting stability:
- Ceiling Anchorage: Always install a dedicated steel swag ceiling hook driven directly into a solid wooden ceiling joist, or use a heavy-duty steel toggle bolt rated for overhead drywall loads. Never hang planters from adhesive strips, plastic push pins, or tension rods.
- Pot Materials & Soil Weight: Porous terracotta pots are heavier than plastic nursery pots and absorb moisture during watering. For maximum safety and ease of care, remove the potted plant from the crochet hanger before watering, allow drainage water to completely drain, and wipe the pot exterior dry before returning it to the hanger.
- Fiber Inspection: Periodically check the top ring enclosure stitches and the lower base wrap knot for any signs of cord fraying or loosening over time. Cotton cord naturally softens with age; annual hand washing in lukewarm water with mild soap keeps the fibers clean and resilient.
Save This Pattern to Pinterest
Pin this free crochet plant hanger tutorial to your home decor or crochet boards so you have the instructions and stitch calculations ready whenever you want to dress up a new houseplant!