There is a profound, comforting magic in hanging handmade stockings by the hearth as winter settles in. Far removed from flimsy store-bought novelties, an artisan crochet Christmas stocking worked in rich natural wool possesses substantial weight, tactile texture, and heirloom durability destined to carry family traditions through generations of holiday mornings.
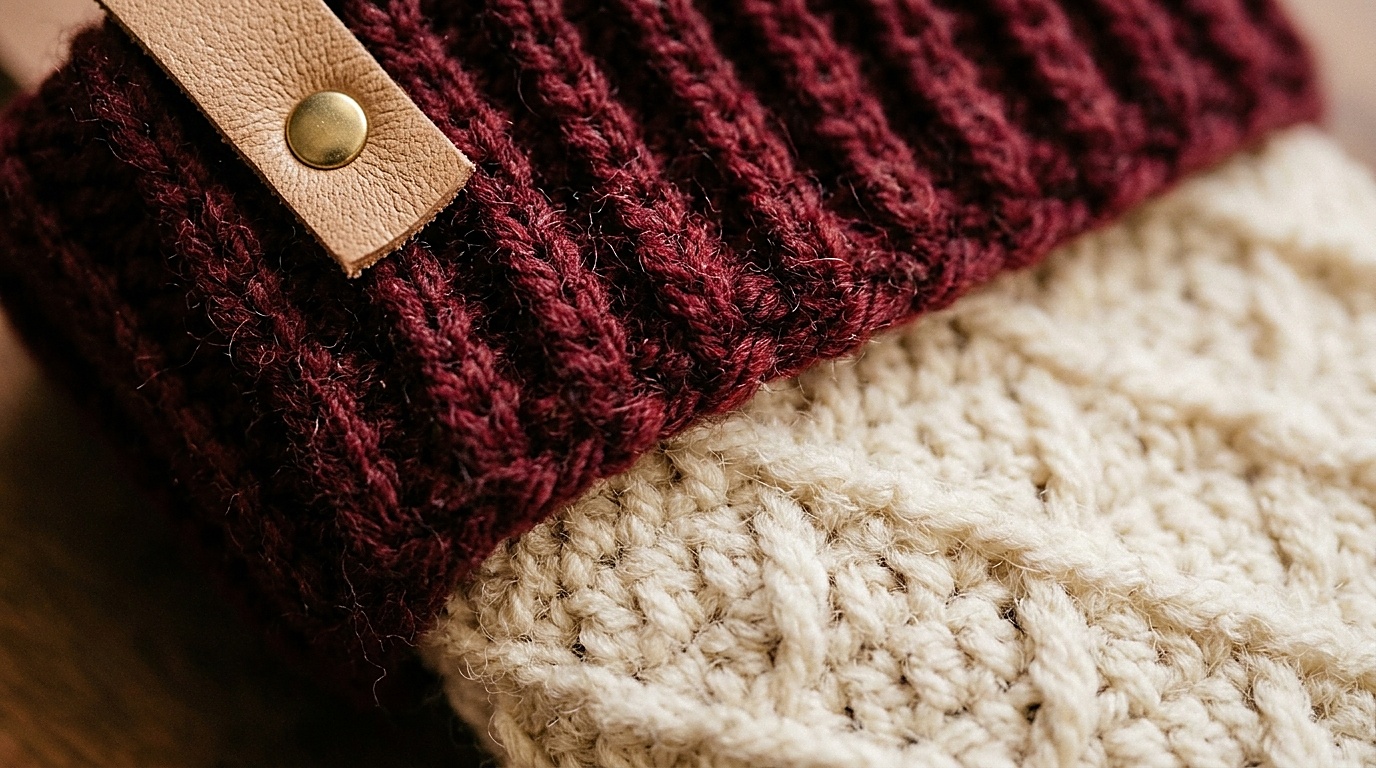
In this comprehensive holiday pattern masterclass, we combine a classic ribbed foldover cuff, a deeply textured diamond alpine stitch leg, and a sturdy reinforced heel flap and rounded toe box. Whether crafted in Scandinavian ivory, festive forest evergreen, or vintage cranberry red, this design balances accessible construction with captivating, boutique-quality stitch definition.
Why You’ll Love Crocheting This Holiday Heirloom
- Substantial Structure & Zero Sag: Worked with dense worsted wool and a 5.5 mm hook, the fabric holds its stately vertical shape effortlessly even when packed with holiday treats, apples, and heavy gift boxes.
- Dense No-Holes Diamond Texture: The alpine stitch alternates front-post trebles with single crochet, creating an impenetrable, plush relief that prevents small stocking stuffers from poking through the weave.
- Seamless Modern Finish: The cuff is worked flat in vertical ribbing, joined into a continuous ring, and seamlessly transitioned into the leg without bulky exterior seams.
- Reinforced Heavy-Duty Hanging Loop: Features instructions for a riveted vegetable-tanned leather hanging strap capable of supporting substantial weight safely on your fireplace mantelpiece.
- Beginner-Friendly Heel Construction: Uses a modified sock-knitting heel flap and turn technique translated into single crochet short rows that eliminate confusing gusset calculations.
Materials & Atelier Specifications

- Yarn: Category 4 Medium Worsted Weight Wool or Wool/Acrylic Blend. Approximately 220 yards (120g) of Main Color (Ivory Cream) and 90 yards (50g) of Accent Color (Deep Burgundy / Cranberry Red). For fiber selection insights, consult our Essential Crochet Yarn Weights Guide.
- Crochet Hook: 5.5 mm (US I-9) ergonomic wooden or aluminum hook (or size needed to obtain gauge). Cross-reference metric sizes with our Crochet Hook Sizes Guide.
- Notions: Tapestry needle, 2 locking stitch markers, sharp thread snips, and optional 0.75-inch wide vegetable-tanned leather strip with brass screw rivet for hanging.
- Finished Dimensions: Approximately 18 inches (46 cm) long from top of cuff to tip of toe; 6.5 inches (16.5 cm) wide across the leg flat.
- Gauge: 14 stitches × 11 rows = 4 × 4 inches (10 × 10 cm) in Alpine Stitch pattern.
In-Depth Fiber Analysis: Choosing the Right Yarn for Structure
Because Christmas stockings are loaded with small gifts, wooden toys, and confections, fiber selection directly impacts how well the piece maintains its sculptural silhouette over years of holiday display:
- 100% Non-Superwash Wool (Top Recommendation): Wool possesses natural crimp, spring, and elastic memory. When hung from a mantel, the interlocking wool scales resist stretching out under gravity. It also responds magnificently to steam blocking, permanently locking the raised alpine diamonds into sharp, dramatic relief.
- 80/20 Wool & Acrylic Blends (Durability & Value): Blends such as Lion Brand Wool-Ease offer the warmth and texture of animal fiber combined with the tensile strength of acrylic. They are machine washable, budget-conscious, and maintain vibrant pigmentation across festive washes.
- 100% Cheap Craft Acrylic (Exercise Caution): While inexpensive, slick low-ply acrylics lack stitch memory. When filled with heavy items, acrylic stockings tend to elongate permanently by 3 to 4 inches, causing unsightly vertical sagging and distorted stitch definition. If using acrylic, size down half a hook millimeter to ensure maximum fabric density.
- Cotton & Plant Fibers (Not Recommended): Plant cellulose fibers lack elasticity. A cotton stocking will drape like a heavy sack without the cozy loft and spring required for traditional winter decor.
Stitch Abbreviations & Techniques
- ch: Chain
- sl st: Slip stitch
- sc: Single crochet
- dc: Double crochet
- blo: Back loop only
- fptr (Front Post Treble Crochet): Yarn over twice, insert hook from front to back to front around the post of the specified double crochet 2 rows below, yarn over and pull up a loop, [yarn over, pull through 2 loops] 3 times.
- sc2tog: Single crochet 2 stitches together (decrease).
Mastering the Alpine Stitch: Tension & Counting Secrets
The alpine stitch is renowned for its architectural texture, but it has two common traps that catch intermediate crafters off-guard. Follow these atelier secrets for a flawless result:
- The “Hidden Stitch” Trap: When working a front-post treble crochet (fptr) around a double crochet two rows below, the single crochet stitch directly behind it on the working row must be skipped. If you accidentally work into both the fptr and the sc behind it, you will unintentionally increase your stitch count, causing the stocking leg to flare outward like a bell.
- Consistent Pull-Up Height: When drawing up the initial loop of the fptr, pull the loop up generously to the height of your current row. If you pull too tightly, the post will bow the fabric downward, puckering the surface and preventing the stocking from hanging straight.
- Invisible Seaming in the Round: To eliminate a wandering diagonal seam up the back of the stocking, always make your first single crochet of each row into the very same stitch as your slip-stitch join, keeping stitch markers stationed at the join line. If you are learning color transitions, read our guide on How to Change Colors in Crochet.
Step-by-Step Pattern Walkthrough
Part 1: The Knit-Look Ribbed Cuff
Working vertically in flat rows to achieve elastic ribbing:
- With Accent Color (Cranberry Red), ch 16.
- Row 1: Sc in 2nd ch from hook and each ch across; turn [15 sc].
- Row 2 to 44: Ch 1, sc in BLO across each stitch; turn [15 sc].
- Fold the ribbed band so Row 1 meets Row 44. Sl st through both thicknesses to join into a tube. Fasten off Accent Color. Turn the tube right-side out.
Part 2: The Alpine Stitch Leg
Join Main Color (Ivory Cream) along the lower row edges of the ribbed cuff:
- Foundation Round: Ch 1, work 44 sc evenly around the bottom edge of the cuff (1 sc per row end); join with sl st to first sc [44 sts].
- Round 1 (DC setup): Ch 2 (does not count as st), dc in each st around; join with sl st to first dc [44 dc].
- Round 2 (Base SC): Ch 1, sc in each st around; join with sl st to first sc [44 sc].
- Round 3 (First Alpine Texture): Ch 2, *fptr around the dc stitch 2 rows below, skip the sc behind it, dc in next sc; repeat from * around; join with sl st [44 sts].
- Round 4: Ch 1, sc in each st around; join with sl st [44 sc].
- Round 5 (Alternating Alpine): Ch 2, *dc in next sc, fptr around the dc 2 rows below; repeat from * around; join with sl st [44 sts].
- Repeat Rounds 2 through 5 until the leg measures approximately 10 inches from the top of the folded cuff, ending on a Round 4 (sc round). Fasten off Main Color.

Part 3: The Reinforced Heel Flap & Turn
Attach Accent Color (Cranberry Red) to the back seam:
- Heel Flap: Work 22 sc across half the circumference. Leave remaining 22 stitches unworked for the instep. Work 10 rows of sc back and forth across these 22 stitches [22 sts].
- Heel Turn (Short Rows):
- Row 1: Ch 1, sc in 13 sts, sc2tog, sc in next st; turn leaving remaining sts unworked.
- Row 2: Ch 1, sc in 6 sts, sc2tog, sc in next st; turn.
- Row 3: Ch 1, sc to 1 st before the gap, sc2tog across gap, sc in next st; turn.
- Repeat Row 3 until all heel stitches are resolved [14 heel sts remain]. Fasten off Accent Color.
- Gusset & Foot: Rejoin Main Color (Ivory). Pick up 8 sc along the side of the heel flap, work 22 alpine pattern stitches across the instep, pick up 8 sc along the opposite heel side, and work across 14 heel stitches. Resume working in joined rounds for 6 inches until reaching the base of the little toe.
Part 4: The Rounded Toe Box
Rejoin Accent Color (Cranberry Red) to finish the toe:
- Round 1 (Decrease): Ch 1, *sc in 9 sts, sc2tog; repeat from * around [40 sts].
- Round 2: Sc in each st around [40 sts].
- Round 3 (Decrease): Ch 1, *sc in 3 sts, sc2tog; repeat from * around [32 sts].
- Round 4: Ch 1, *sc in 2 sts, sc2tog; repeat from * around [24 sts].
- Round 5: Ch 1, *sc in 1 st, sc2tog; repeat from * around [16 sts].
- Round 6: Sc2tog around [8 sts]. Fasten off leaving a 10-inch tail. Thread tail onto tapestry needle, weave through front loops of remaining 8 sts, pull tightly closed, and knot securely on the inside.
Custom Sizing Blueprint: Small Pet to Grand Victorian
Customizing your handmade stockings allows you to create matching, scaled sets for every member of the family, including pets and grandchildren. Adjust your initial cuff length and round counts using this atelier sizing matrix:
| Size Profile | Cuff Rows (Stitch Count) | Leg Length | Foot Length | Total Finished Length | Recommended Use |
|---|---|---|---|---|---|
| Pet / Nursery Mini | 32 rows (32 sts) | 6 inches (15 cm) | 4.5 inches (11 cm) | 12 inches (30 cm) | Puppies, kittens, baby’s first Christmas |
| Classic Heirloom (Standard) | 44 rows (44 sts) | 10 inches (25 cm) | 6 inches (15 cm) | 18 inches (46 cm) | Standard fireplace mantels, gift stuffers |
| Grand Victorian / Santa Sack | 56 rows (56 sts) | 14 inches (35 cm) | 8.5 inches (21 cm) | 24 inches (61 cm) | Large fireplace hearths, substantial gifts |
Heirloom Finishing, Blocking & Leather Strap Assembly

- Steam Blocking Mastery: Pin the finished stocking flat onto a high-density foam blocking board, paying special attention to squaring the heel flap and smoothing the toe seam. Hover a steam iron 1 to 1.5 inches above the wool fibers without ever touching the yarn directly. Pat gently with clean palms and allow to dry for 24 hours. This unlocks the three-dimensional relief of the alpine stitch.
- Attaching the Riveted Leather Strap: Cut a 6-inch strip of 0.75-inch wide vegetable-tanned leather. Punch a 4 mm hole through both aligned ends using a leather hole punch. Loop the strap around the top inner seam of the stocking, insert a solid brass Chicago screw rivet through the holes, and tighten securely with a flathead screwdriver. This provides 10× more tensile strength than a yarn chain loop.
- Off-Season Storage & Moth Defense: Store your heirloom stockings flat in a breathable cotton storage bag with natural cedar wood blocks. Avoid plastic bins that trap ambient moisture or wire hangers that permanently distort the ribbed cuff structure over summer months.
- Festive Mantel Pairings: Frame your handmade stockings with fresh cedar boughs, dried orange slice garlands, brass taper candle holders, and handmade ornaments. For matching holiday projects, explore our Crochet Christmas Tree Ornaments Free Pattern.
Frequently Asked Questions (High-Intent Crafter Guide)
Can I use bulky #5 or plush velvet yarn for this pattern?
Yes, but you must size down your foundation stitch count by approximately 25% (working 32 to 34 stitches around the leg instead of 44) and switch to a 6.5 mm or 7.0 mm hook. Note that while velvet yarn is soft, it lacks the sculptural stitch definition of worsted wool, making the alpine diamonds appear less defined.
Why is my heel cup puckering or turning out too pointy?
A pointy heel cup occurs when short row turns are worked with loose tension, leaving loose edge holes. Ensure you pull the yarn firmly when turning each short row and decreasing across the gap. If puckering persists, drop one row from your heel flap height.
How do I personalize the stocking with embroidered names or monograms?
The ribbed foldover cuff provides the ideal canvas for chain stitch or duplicate stitch embroidery. Use a contrasting color yarn (such as metallic gold or dark forest green) and a blunt tapestry needle to embroider names directly onto the ribbing before stitching the leather strap.
Can I line the stocking with fabric to prevent small items from catching?
While the dense alpine stitch makes lining optional, adding a simple cream linen or cotton muslin liner adds boutique luxury. Cut two pieces of fabric matching the stocking outline, stitch with a 0.5-inch seam allowance, and hand-sew the top opening to the interior seam just below the ribbed cuff fold.
How do I fix a wandering diagonal seam on the back of the stocking?
If your slip-stitch seam begins migrating to the right, work your joining slip stitch tightly into the first true stitch of the round (not the turning chain). Alternatively, turn your work after each round to keep the seam running in an exact vertical line.
Save This Heirloom Stocking Pattern to Pinterest
Planning your holiday handmade crafting? Pin these step-by-step visual guides to your favorite Christmas Crochet or Holiday DIY board on Pinterest!