Few holiday crafting trends have taken the fiber arts community by storm quite like the viral hexagon granny stocking. Instead of struggling with complex short-row heels, gusset decreases, or awkward toe grafting, this Modern Boho Hexagon Crochet Christmas Stocking relies on the pure geometric genius of a single expanding hexagon. As rounds of rhythmic three-double-crochet clusters expand, the motif naturally ripples into an origami-like form that, when folded in half, effortlessly snaps into the iconic boot silhouette.
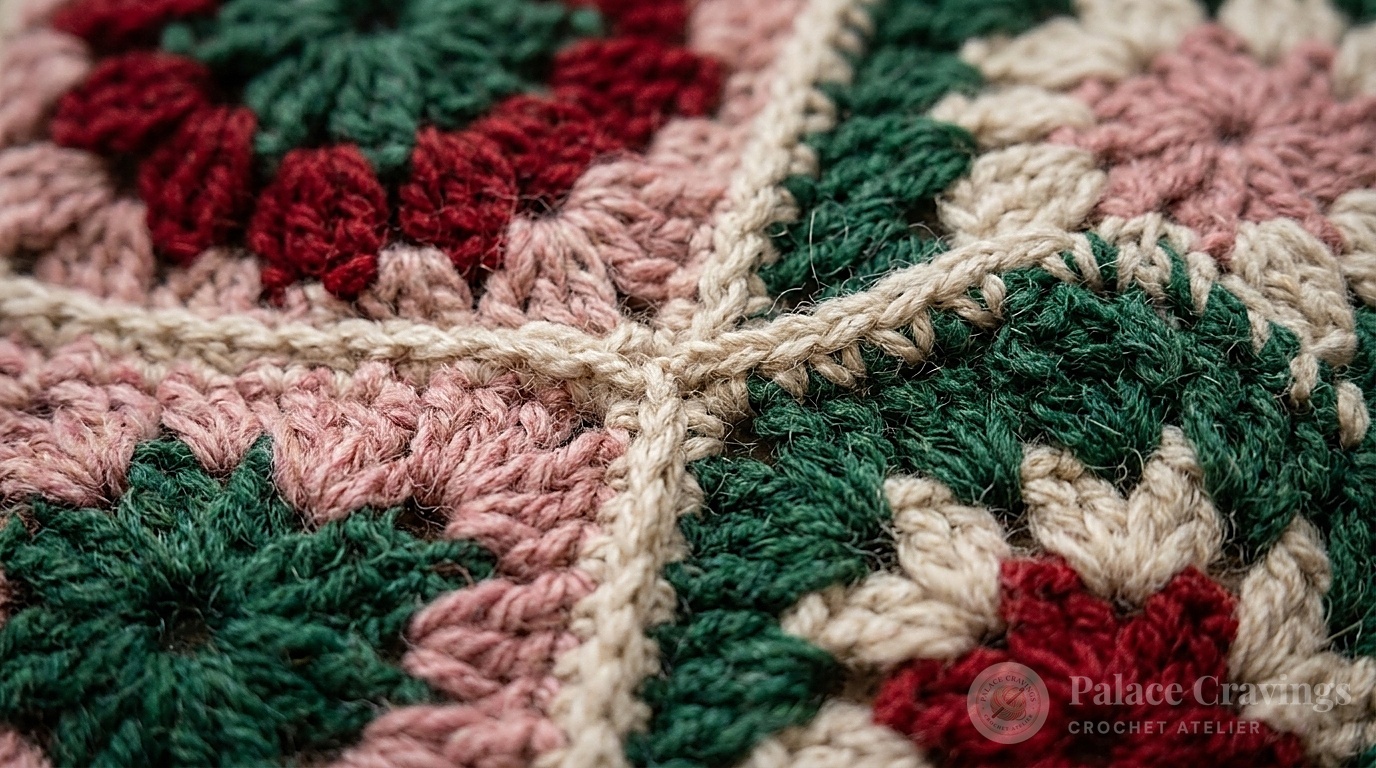
Whether styled in nostalgic retro pastels or rich farmhouse jewel tones, this hexagon stocking serves as both an eye-catching fireplace mantel showstopper and a spacious gift holder. Measuring approximately 11 inches wide across the foot and 12.5 inches from cuff to heel, it holds holiday treats, small gift boxes, and winter goodies without stretching out of proportion. Best of all, because it is worked in the round from the center out, it works up in just one or two relaxed holiday crafting evenings.
Why You’ll Love the Granny Hexi Method
- Zero Complex Heel Turns: Traditional stocking construction often intimidates beginners with German short rows or heel flaps. Here, the boot shape is formed entirely by folding, eliminating confusing heel math.
- Effortless Stash Busting: Each round uses between 20 to 80 yards of worsted yarn, making it the ultimate project for transforming leftover holiday yarn cakes into coordinated family stocking sets.
- Hypnotic Cluster Rhythm: Classic 3-double-crochet granny clusters worked directly into chain spaces allow for relaxing, rhythmic stitching while watching your favorite holiday movies.
- Tailored Color Blocking: Easily personalize each stocking for family members by alternating colors on different rounds while maintaining an overarching cohesive look on your mantel.
Essential Tools for Hexagon Motif Projects
Working multi-color granny motifs requires precision tools to maintain flat cluster tension and weave ends securely:
Clover Amour Ergonomic Hook (Size H / 5.0mm)
The optimal hook for worsted weight acrylic. Glides effortlessly between chain spaces without splitting yarn plies during rapid cluster repeats.
Clover Locking Stitch Markers (Set of 30)
Indispensable for clipping the 6 corner spaces and pinning the folded edges together perfectly before seaming the sole and heel.
Clover Chibi Steel Tapestry Needle Set
Curved bent-tip needles in a secure case. Weaves color-change yarn tails invisible between dense granny clusters without splitting fibers.
Fiskars 5″ Precision Micro-Tip Scissors
Faceted stainless steel blades cut cleanly through multiple yarn strands when changing colors at every round transition.
Key Materials, Yardage & Sizing Specifications
To recreate the exact structure, size, and proportions of our studio model, follow the verified specifications below. For alternative yarn options, consult our Essential Crochet Yarn Weights Guide.

Special Stitches & Technique Foundations
Before launching into Round 1, review these essential technique definitions:
- Granny Cluster (3-dc group): Work 3 double crochets into the designated chain space. Never work into the individual top loops between clusters; working directly into the open spaces creates the signature granny texture.
- Double Crochet 3 Together (Dc3tog): (Yarn over and draw up a loop in indicated space. Yarn over and draw through 2 loops on hook) 3 times. Yarn over and draw through all 4 loops on hook. Used along the toe section to shape the rounded sock curve.
- The “Wavy Hexagon” Rule: As your hexagon expands past Round 4, it will begin to ripple and buckle instead of lying flat on your desk. This is completely normal and intentional! The excess fabric is what creates the 3D depth when folded into a boot.
- Reverse Single Crochet (Crab Stitch): Working from left to right (in reverse of standard crochet direction), insert hook into previous stitch, yarn over, draw up a loop, and pull through both loops. Creates a rolled, corded boutique cuff edge.
Step-by-Step Hexi Stocking Pattern Walkthrough
Foundation Ring: With Contrast C (Spring Green), ch 4. Join with sl st to first ch to form a ring.
Round 1: Ch 3 (counts as dc throughout). 2 dc in ring. (Ch 2, 3 dc in ring) 5 times. Ch 2. Join with sl st to top of beg ch-3. [6 groups of 3-dc and 6 corner ch-2 spaces]. Fasten off C.
Round 2: Join Contrast B (Pink) with sl st in any corner ch-2 space. Ch 3, (2 dc, ch 2, 3 dc) in same space. *Skip next 3 dc, (3 dc, ch 2, 3 dc) in next ch-2 space. Repeat from * 4 times more. Join with sl st to top of ch-3. Fasten off B. [6 corners of (3 dc, ch 2, 3 dc)].
Round 3: Join Contrast D (White) with sl st in any corner ch-2 space. Ch 3, (2 dc, ch 2, 3 dc) in same space. *Skip next 3 dc, 3 dc in space between next 2 clusters. Skip next 3 dc, (3 dc, ch 2, 3 dc) in next corner ch-2 space. Repeat from * 4 times more. Skip next 3 dc, 3 dc in space between last 2 clusters. Join with sl st to top of ch-3. Fasten off D.
Round 4: Join Contrast C with sl st in any corner ch-2 space. Ch 3, (2 dc, ch 2, 3 dc) in same space. *(Skip next 3 dc, 3 dc in space between next 2 clusters) twice. Skip next 3 dc, (3 dc, ch 2, 3 dc) in next corner ch-2 space. Repeat from * 4 times more. (Skip next 3 dc, 3 dc in space between next 2 clusters) twice. Join with sl st to top of ch-3. Fasten off C.

Round 5: Join Contrast A (Turqua/Cranberry) with sl st in any corner ch-2 space. Ch 3, (2 dc, ch 2, 3 dc) in same space. *[Skip next 3 dc, 3 dc in next space between clusters] across to next corner, (3 dc, ch 2, 3 dc) in corner ch-2 space. Repeat from * around all 6 sides. Join with sl st to top of ch-3.
Rounds 6 & 7: Sl st in each of next 2 dc and into corner ch-2 space. Continue in pattern with Contrast A, working (3 dc, ch 2, 3 dc) in each corner and 3 dc in each space along sides. Fasten off A at end of Round 7.
Round 8: Join Contrast C and repeat pattern. Fasten off C.
Round 9 (Expanded Base): Join Contrast D and work 3 dc in each space along sides and corners as established. Fasten off D.
Folding & Boot Assembly
- The Magic Fold: Lay your wavy hexagon flat with wrong side facing up. Locate two opposite corner points. Fold the hexagon in half along a diagonal line connecting these two points. The piece will naturally snap into an “L” boot shape with a vertical leg tube, a diagonal heel, and a horizontal foot tube!
- Pinning the Seams: Using your locking stitch markers, pin the bottom foot sole and back leg seams together, matching cluster for cluster.
- Toe Shaping: Along the toe opening, work 2 short rounds of single crochet with evenly spaced Dc3tog decreases to close the toe into a smooth rounded curve. Fasten off and weave in tail.
- Seaming: Using your tapestry needle and matching yarn, work a whipstitch or mattress stitch through the outer loops along the sole and back heel. Turn stocking right side out.
Top Cuff & Hanging Loop
Join Contrast D (White) with a slip stitch at the back seam of the top leg opening:
- Round 1 (Cuff Foundation): Ch 1. Work single crochet evenly around the entire top opening (approx. 36 sc). Join with sl st to first sc.
- Round 2 (Crab Stitch): Ch 1. Do NOT turn. Work 1 reverse single crochet in each stitch to the right around the opening to form a corded edge.
- Hanging Loop: At the back seam corner, chain 16 loosely. Slip stitch back into the foundation stitch. Work 18 single crochets directly over the chain loop to reinforce it. Fasten off and weave in ends securely on the inside.
3 Atelier Secrets for Flawless Hexi Stockings
1. Trust the Ruffle: When your hexagon reaches Rounds 6 through 8, it will look like a wavy potato chip that refuses to lie flat. Do not try to block it flat at this stage! The waves are necessary geometry that gives the finished stocking boot its interior volume.
2. Count Cluster Spaces, Not Stitches: Each side of your hexagon must have the exact same number of 3-dc clusters before folding. Skipping even one cluster along a side will make the leg and foot mismatched when folded.
3. Reinforce the Hanging Loop: When filled with stocking stuffers, holiday gifts can weigh 2 to 3 pounds. Always anchor the hanging loop through both the top cuff stitch and the inner body seam to prevent yarn stretching over time.

Frequently Asked Questions
Can I make this stocking bigger or smaller?
Yes! For an oversized jumbo stocking (approx. 16″ long), add 2 additional granny cluster rounds (Rounds 10 & 11) before folding. For mini ornament stockings, stop after Round 5 and fold into an adorable 6-inch gift card holder!
Do I need to line this crochet stocking with fabric?
While the dense worsted granny clusters hold standard wrapped presents and citrus fruits without gaping, sewing an optional muslin or satin lining protects the yarn stitches from catching on sharp candy cane edges.
How do I wash and care for this stocking?
Hand wash in cold water with mild detergent or place inside a protective mesh laundry bag on gentle cycle. Lay flat on dry towels to reshape. Do not machine dry to preserve the crisp reverse single crochet cuff.
Pin This Pattern for Later
Save this modern boho hexagon crochet Christmas stocking to your favorite DIY holiday decor or crochet patterns board on Pinterest so you have the round-by-round cluster counts, fold diagram, and cuff tutorial ready whenever holiday crafting season arrives!